Step 1
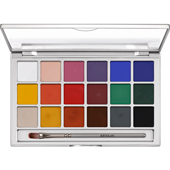
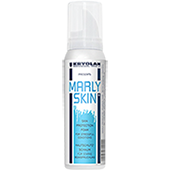
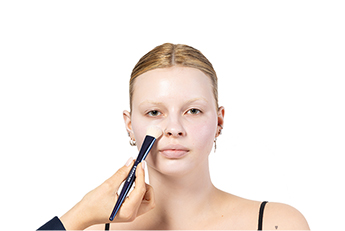
Let's start the make-up look with a step that all make-up enthusiasts can appreciate: cleansing the skin. Use Natural Micellar Water 120 ml to gently remove any surface oils and impurities from your skin. Prepare your skin for the make-up application by applying Marly Skin - Hautschutzschaum. This will create a slightly tacky base that helps your make-up adhere better and allows for smoother coverage. Now, it's time to add some color to your canvas. Take a blending brush and lightly apply shades 070 and R29 from the Coloring Vision Palette 18 Farben (Vivid) onto the skin. Instead of a heavy application, use a gentle moving technique. This will give your make-up a soft, flowing look, almost like a watercolor painting. Don't worry about setting it with powder just yet.
Let's start the make-up look with a step that all make-up enthusiasts can appreciate: cleansing the skin. Use Natural Micellar Water 120 ml to gently remove any surface oils and impurities from your skin. Prepare your skin for the make-up application by applying Marly Skin - Hautschutzschaum. This will create a slightly tacky base that helps your make-up adhere better and allows for smoother coverage. Now, it's time to add some color to your canvas. Take a blending brush and lightly apply shades 070 and R29 from the Coloring Vision Palette 18 Farben (Vivid) onto the skin. Instead of a heavy application, use a gentle moving technique. This will give your make-up a soft, flowing look, almost like a watercolor painting. Don't worry about setting it with powder just yet.
Step 2
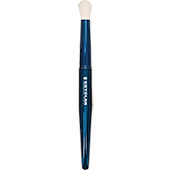
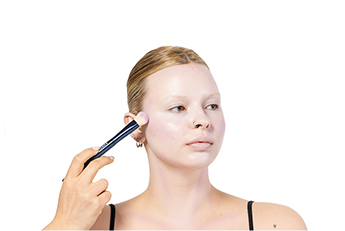
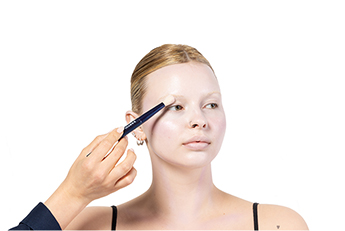
To achieve an androgynous structure, apply shade R29 from the Coloring Vision Palette 18 Farben (Vivid). Using a make-up brush, like the Blue Master Ultimate Buffing Brush, apply this shade strategically to the natural hollows and contours of your face. These hollows are typically found along the sides of your nose, under your cheekbones, and along your jawline. The brush's precision ensures that you achieve not only flawless coverage but also precise placement, accentuating your facial structure in just the right places.
To achieve an androgynous structure, apply shade R29 from the Coloring Vision Palette 18 Farben (Vivid). Using a make-up brush, like the Blue Master Ultimate Buffing Brush, apply this shade strategically to the natural hollows and contours of your face. These hollows are typically found along the sides of your nose, under your cheekbones, and along your jawline. The brush's precision ensures that you achieve not only flawless coverage but also precise placement, accentuating your facial structure in just the right places.
Step 3
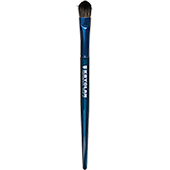
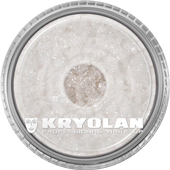
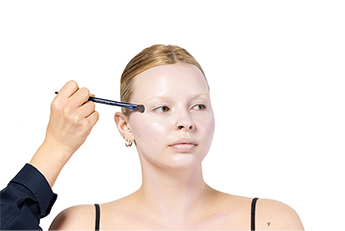
Take some Holographic Pigments in Holographic Pigments (hologram) and Holographic Pigments (solar) and load them onto a Blue Master Blending Brush Small. These pigments are your secret weapons for a mesmerizing look. Focus on applying these pigments to the high points of your face to make those areas shine brightly. These areas, such as the tops of your cheekbones, the bridge of your nose, and your brow bone, are where you'll apply the pigments. Gently sweep the brush over these zones to make them come alive with radiant light. As you apply the pigments, allow them to blend naturally with the base make-up you created earlier. This seamless fusion of colors and textures will bestow upon your complexion an otherworldly radiance that captivates.
Take some Holographic Pigments in Holographic Pigments (hologram) and Holographic Pigments (solar) and load them onto a Blue Master Blending Brush Small. These pigments are your secret weapons for a mesmerizing look. Focus on applying these pigments to the high points of your face to make those areas shine brightly. These areas, such as the tops of your cheekbones, the bridge of your nose, and your brow bone, are where you'll apply the pigments. Gently sweep the brush over these zones to make them come alive with radiant light. As you apply the pigments, allow them to blend naturally with the base make-up you created earlier. This seamless fusion of colors and textures will bestow upon your complexion an otherworldly radiance that captivates.
Step 4
To take your highlight game to the next level, let's enhance those gorgeous features even further. Take Glamour Sparks (noble) and apply it strategically to selected areas of your face. This little trick will work like magic, giving your skin a mesmerizing, multi-tonal shine that resembles the stunning wet-look effect often seen in high-fashion editorials. You'll be radiating confidence with this luminous touch to your make-up.
To take your highlight game to the next level, let's enhance those gorgeous features even further. Take Glamour Sparks (noble) and apply it strategically to selected areas of your face. This little trick will work like magic, giving your skin a mesmerizing, multi-tonal shine that resembles the stunning wet-look effect often seen in high-fashion editorials. You'll be radiating confidence with this luminous touch to your make-up.
Step 5
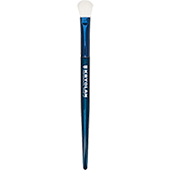
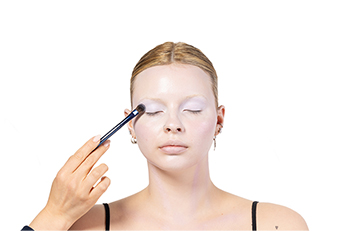
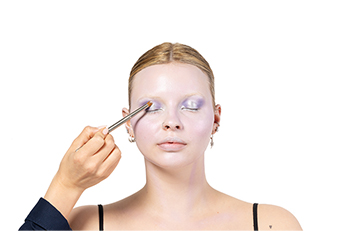
Let's bring some artistry into eye make-up! Begin by mixing HD Cream Liner in HD Cream Liner (dark orchid) with HD Cream Liner (snow) to create a lovely lavender shade. Now, take your trusted Blue Master Eye Shadow Blender Large and delicately apply this lavender blend all over your mobile lid, softly blending it up to your brow bone. This technique will give you a beautiful, sheer wash of color that's perfect for a subtle yet captivating look. Don't rush – allow the product a moment to set and dry after you've expertly blended it. This step ensures your eye make-up stays in place, so you can enjoy your stunning eye look all day or night.
Let's bring some artistry into eye make-up! Begin by mixing HD Cream Liner in HD Cream Liner (dark orchid) with HD Cream Liner (snow) to create a lovely lavender shade. Now, take your trusted Blue Master Eye Shadow Blender Large and delicately apply this lavender blend all over your mobile lid, softly blending it up to your brow bone. This technique will give you a beautiful, sheer wash of color that's perfect for a subtle yet captivating look. Don't rush – allow the product a moment to set and dry after you've expertly blended it. This step ensures your eye make-up stays in place, so you can enjoy your stunning eye look all day or night.
Step 6
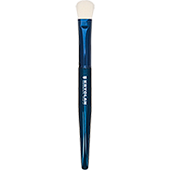
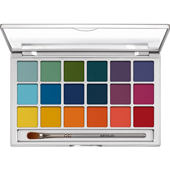
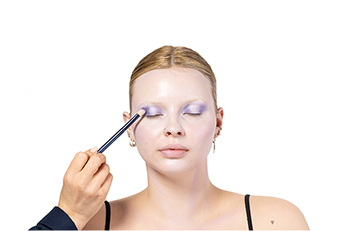
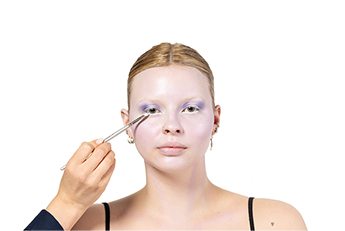
Let's dive into the next step to achieve a captivating Alien-like look. Use your Blue Master Multi-Purpose Blender Brush Small and dip it into the shade R29 from the Eye Shadow Variety 18 Farben (V 2). Now, focus on applying this pigment to both the inner and outer corners of your eyes. The key here is to leave the center of your eyelids free, creating a fascinating negative space effect. This technique not only adds depth and definition to your eyes but also works like magic to make your eyes appear wider, giving you that unique extraterrestrial allure that's simply out of this world. Take your time and enjoy the process as you blend and craft your otherworldly eye look.
Let's dive into the next step to achieve a captivating Alien-like look. Use your Blue Master Multi-Purpose Blender Brush Small and dip it into the shade R29 from the Eye Shadow Variety 18 Farben (V 2). Now, focus on applying this pigment to both the inner and outer corners of your eyes. The key here is to leave the center of your eyelids free, creating a fascinating negative space effect. This technique not only adds depth and definition to your eyes but also works like magic to make your eyes appear wider, giving you that unique extraterrestrial allure that's simply out of this world. Take your time and enjoy the process as you blend and craft your otherworldly eye look.
Step 7
Now, let's move on to a step that adds definition and balance to your make-up look. Pick up your trusted Premium Brow Brush and load it with HD Cream Liner (snow). Carefully apply this liner to your waterline, the area just above your lower lashes. Continue applying it until you reach the desired level of opacity, ensuring that the color appears rich and solid. This technique not only defines your eyes but also helps achieve a harmonious balance in your overall make-up.
Now, let's move on to a step that adds definition and balance to your make-up look. Pick up your trusted Premium Brow Brush and load it with HD Cream Liner (snow). Carefully apply this liner to your waterline, the area just above your lower lashes. Continue applying it until you reach the desired level of opacity, ensuring that the color appears rich and solid. This technique not only defines your eyes but also helps achieve a harmonious balance in your overall make-up.
Step 8
Next, let's explore a step that adds texture and brightness to the center of your eyes. Here's how to do it:
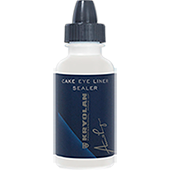
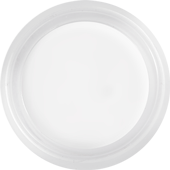
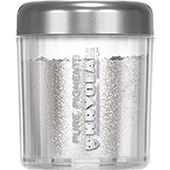
Begin by mixing two products: Pure Pigments Metallic (pure silver) and Cake Eye Liner Sealer. This combination creates a fluid application. Once you've achieved a consistency that you're happy with, it's time to grab a flat brush. With this brush, gently apply the mixture to the center of your eyes. This technique will make your eyes pop and create a mesmerizing focal point. For an extra touch of brilliance, use a liner brush to apply the same mix to the inner corners of your eyes. This adds a subtle yet stunning highlight that draws attention to your eyes' natural radiance.
Next, let's explore a step that adds texture and brightness to the center of your eyes. Here's how to do it:
Begin by mixing two products: Pure Pigments Metallic (pure silver) and Cake Eye Liner Sealer. This combination creates a fluid application. Once you've achieved a consistency that you're happy with, it's time to grab a flat brush. With this brush, gently apply the mixture to the center of your eyes. This technique will make your eyes pop and create a mesmerizing focal point. For an extra touch of brilliance, use a liner brush to apply the same mix to the inner corners of your eyes. This adds a subtle yet stunning highlight that draws attention to your eyes' natural radiance.
Step 9
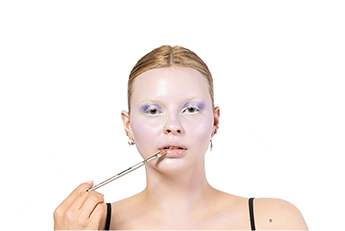
Now, let's move on to the lips, where we'll keep it simple and fresh to harmonize with the overall look. Here's how to achieve this delightful lip effect:
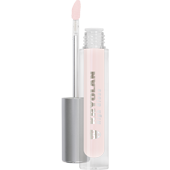
Start by applying High Gloss (crystal rose) to the center of the lips. To do this, you can use a flat brush, which provides precise control and an even application. For an added touch of magic, let's layer on some Holographic Pigments (hologram) right on top of the Crystal Rose. This step beautifully ties together all the finishes of your make-up, creating a cohesive and radiant appearance. Remember, simplicity can be incredibly elegant, and your lips will perfectly complement the entire look you've created.
Now, let's move on to the lips, where we'll keep it simple and fresh to harmonize with the overall look. Here's how to achieve this delightful lip effect:
Start by applying High Gloss (crystal rose) to the center of the lips. To do this, you can use a flat brush, which provides precise control and an even application. For an added touch of magic, let's layer on some Holographic Pigments (hologram) right on top of the Crystal Rose. This step beautifully ties together all the finishes of your make-up, creating a cohesive and radiant appearance. Remember, simplicity can be incredibly elegant, and your lips will perfectly complement the entire look you've created.
Step 10
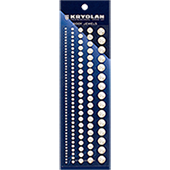
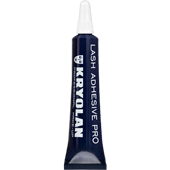
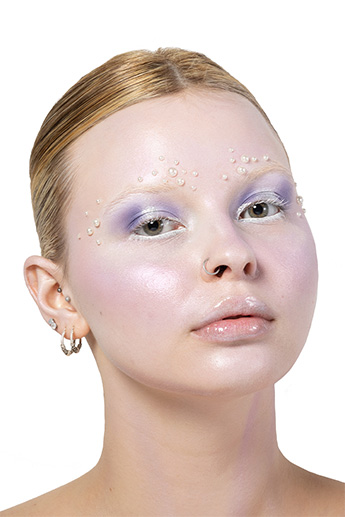
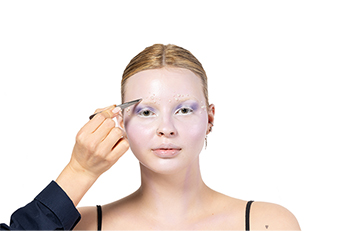
Now follows the final step. Let's add some exquisite finishing touches that will enhance the overall appeal of your make-up. We're going to apply embellishments around your brow bone to create a charming 3D effect. To get started, we'll be using a mix of sizes from theBody Jewels Pearls. These can be easily applied using tweezers, which offer both precision and ease of placement. Before attaching each jewel, place a small dot of Lash Adhesive Pro 4 g (neutral) on the back of it. This step ensures that the jewels stay securely in place, giving your make-up look longevity and durability. These embellishments will add a touch of glamour and depth to your make-up, making it truly stand out.
Pro Tip:
To extend the wear of your make-up even further, consider applying a light layer of Transparent Puder 50 g as a finishing touch. This optional step can help lock your make-up in place and ensure it stays flawless throughout the day and night.
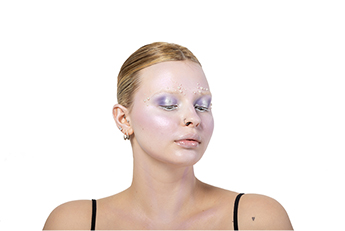
Final